Overview
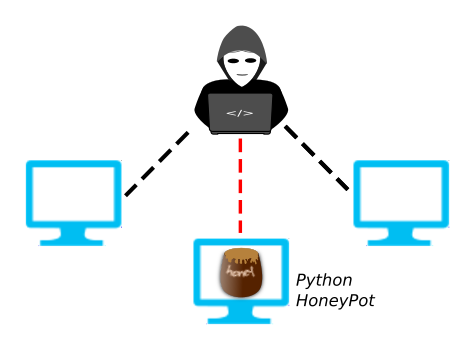
A malicious network actor (e.g., malware or an intruder) on a local network will attempt to find open ports as a way to discover information about a system and gain entry into it. One of the ways to detect this activity is with a honey pot. This is a specialized open port disguised as a legitimate service for the purpose of catching and alerting malicious or undesired activity.
In this article, we use Python and its socket library to develop a honey pot. There are many different paths to take when developing a honey pot. One can go as far as fully emulating a particular service (i.e., ftp) and allowing the bad actor to download false or potentially dangerous files (e.g., launch malware on your neighbor's network in retribution for him or her jumping onto yours).
In this article, we're going to meet the following goals:
- Create a Python listener on an IPv4 known port address (telnet) using sockets
- Show that nmap discovers our honey pot
- Alert us when our honey pot is accessed: occurrence of a TCP (SYN/ACK) handshake
With just this basic, simple Python script, we can be alerted to malicious activity on our network.
Configuration
We develop and test our honey pot using two Linux systems. The client system (Ubuntu 18.04) is used to run nmap and tcpdump. The server (Yocto, embedded Linux) is used to run our Python3 honeypot.py script as root. Note that two systems aren't actually required, and the honey pot could be run on almost any machine where Python is installed.
Tcpdump is a command line program that displays network activity. If you're unfamiliar with tcpdump you may want to review our article Examples and Options with tcpdump.
Nmap "is a free and open source (license) utility for network discovery and security auditing". It's a great tool for probing networks and discovering information (i.e., open ports on any networked system).
Both nmap and tcpdump can be installed on Ubuntu using the apt package manager:
$ sudo apt install tcpdump
$ sudo apt install nmap
The Python socket interface is modeled after the Unix socket API. When working with Python sockets, you may want to refer to Linux man pages for various definitions:
$ man socket
...
DESCRIPTION
socket() creates an endpoint for communication and returns a file descriptor that refers to that endpoint.
The file descriptor returned by a successful call will be the lowest-numbered file descriptor not currently
open for the process.
...
As pointed out in the Python socket documentation, the socket module / interface depends on calls to the underlying operating system, so your usage of the provided example may work differently ( or not at all) on a particular system.
Preliminaries
Let's start out by verifying that nmap and tcpdump
are working properly on our client system by confirming that an
$ nmap 192.168.3.200 -p 21

Starting Nmap 7.60 ( https://nmap.org ) at 2018-12-01 12:01 EST
Nmap scan report for p1010 (192.168.3.200)
Host is up (0.00034s latency).

PORT   STATE SERVICE
21/tcp open  ftp

Nmap done: 1 IP address (1 host up) scanned in 0.05 seconds
$ sudo tcpdump -Xvn -i enp2s0 host 192.168.3.200 and port 21
...
<packet dump>
...
You should see packets exchanged in shell 2 when running nmap in shell 1. It's a good idea at this point to play around with different nmap options (e.g., -sV: determine service) and also try this with the ftp server not running. Note that if you're not sure which services are actually running on your (Linux) machine that have open ports, then you can run nmap without any port arguments to get a full list:
$ nmap 192.168.3.200

...
PORT     STATE  SERVICE     VERSION
20/tcp   closed ftp-data
21/tcp   open   ftp         vsftpd 3.0.3
22/tcp   open   ssh         OpenSSH 7.4 (protocol 2.0)
80/tcp   closed http
443/tcp  closed https
3128/tcp closed squid-http
And keep in mind that an intruder on your system can run a similar discovery!
Socket basics from the shell
The Python socket documentation is extensive and provides enough examples that will get you started. For our purposes, let's show the setup of a basic listening port using the Python 3 interpreter on port 23 (telnet):
# python3
>>> from socket import socket, AF_INET, SOCK_STREAM
>>> sk=socket(AF_INET,SOCK_STREAM)
>>> sk.bind(('192.168.3.200',23))
>>> sk.listen()
>>> conn,addr = sk.accept()
This last line should now block, waiting for a client to connect. Go back to shell 1 on the client and run nmap with "-p 23".
$ nmap 192.168.3.200 -p 23

...
PORT   STATE SERVICE
23/tcp open  telnet

Nmap done: 1 IP address (1 host up) scanned in 0.02 seconds
Go back to your Python shell on the server, and the command line should have returned. Type the following into the shell:
>>> print('alert ' + addr[0] + ' has connected with us')
Bringing it together
The source code for our honeypot.py script is provided below. Run the script on your server and provide the IP address that matches the interface you're listening on using the '-a' option.
# ./honeypot.py -a 192.168.3.200
Now run nmap to scan the system at port 23:
$ nmap 192.168.3.200 -p 23

...
PORT   STATE SERVICE
23/tcp open  telnet

Nmap done: 1 IP address (1 host up) scanned in 0.02 seconds
You should see the honey pot report the activity as shown below:
# ./honeypot.py -a 192.168.3.200
honeypot has been visited by 192.168.3.36
You can also try your honey pot using the telnet client. It should close the port after the user hits the enter key (return).
$ telnet 192.168.3.200
Trying 192.168.3.200...
Connected to 192.168.3.200.
Escape character is '^]'.
Ubuntu 18.04.1 LTS
server login:
Note that it can take up to a minute or two for ports to close after running these tests, so subsequent runs of honeypot.py may return immediately until the port closes / time outs.
Source Code
#!/usr/bin/env python3
"""
Copyright 2017,2018 Mind Chasers Inc,
file: honeypot.py
Demo code.  No warranty of any kind.  Use at your own risk
"""
import sys
import argparse
from socket import socket, AF_INET, SOCK_STREAM

VERSION = '0.1a'
welcome = b"Ubuntu 18.04.1 LTS\nserver login: "

def send_email(src_address):
    """ Todo: send an email if we're scanned / probed on this port """
    pass

def honeypot(address,port=23):
    """ create a single Threaded telnet listen port """
    try:
        ski=socket(AF_INET,SOCK_STREAM)
        ski.bind((address, port))
        ski.listen()
        conn,addr = ski.accept()
        print('honeypot has been visited by ' + addr[0])
        send_email(addr[0])
        conn.sendall(welcome)
        while True:
            data=conn.recv(1024)
            if data == b'\r\n':
                ski.close()
                sys.exit()
    except:
        ski.close()
        sys.exit()

if __name__ == '__main__':
    parser = argparse.ArgumentParser(description='honeypot prototype',
                                 epilog='Version: ' + str(VERSION))
    parser.add_argument('-a','--address',help='server ip address to use',action='store', required=True)
    args = parser.parse_args()

    honeypot(args.address)
Debugging
If you want to step through your honeypot.py script, you can add the following line to the source:
import pdb; pdb.set_trace()
This will create an interactive debugger instance in the shell where you invoked the script. Refer to Python's documentation for more information on the Python debugger.
Issues
You now have the basics of a useful honey pot, but there is still much that can be added and should be considered:
- Keep in mind that a honey pot is basically a fake network service, and they're easy to write. The other side of this story is to remind yourself to not blindly trust network services since providers and hackers can replace or modify them with a compromised implementation for the purpose of stealing data.
- We picked telnet because it's simple to emulate and test. However, you NEVER want to actually have a telnet server running on one of your hosts. Telnet exchanges data across the network in the clear, which means that any eavesdropper can sniff all data exchanged including user credentials.
- If your goal is to create an elaborate honey pot that very closely mimics the behavior of a service, then it may be better to just start with the existing source (e.g., vsftp) and patch in your alerts.
- Our example is single threaded, which may be preferred. Consider the dangers of a multi-threaded honey pot that sends email alerts on each access and the potential to create denial of service attacks by repeatedly stimulating the honey pot service. At the very least, you'll want some sort of rate limiting in a multi-threaded honey pot.
- Consider turning your honey pot script into a daemon and using a cron job to check its status & restart it if necessary. References are provided below for this.
- You may see something like the following between invocations: "honeypot exception : [Errno 98] Address already in use". This can be expected while waiting for the OS to close the port. Give it a little time and try again. If you're stuck, post a comment below
References & Attribution
- Python socket documentation
- Python Daemon (python-daemon)
- Linux cron
- Clipart provided by openclipart.org.


Date: Sept. 20, 2017
Author: Chidi maduakoh
Comment: