Overview
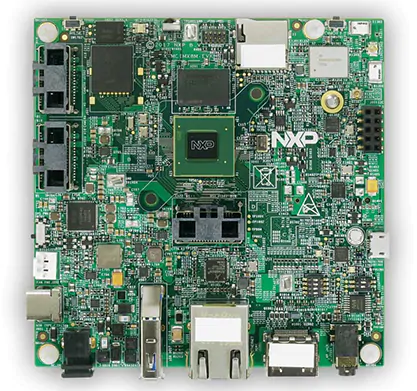
The NXP MCIMX8M-EVK evaluation kit for the i.MX 8MQuad processor is certainly an amazing system, and there is plenty of documentation. However, we found some of the Yocto Linux related documentation confusing, so we are posting this article regarding our steps to accelerate building, booting, and debugging the Linux kernel, device tree, and root file system.
If you're just getting started with your EVK, then you may want to also review part 1 of this series: Build, Install, and Develop with NXP's Latest Yocto Linux BSP for the MCIMX8M-EVK.
Listed below are some of the data points that we may need to know when building the linux-imx kernel outside of the Yocto build system:
- The NXP i.MX 8MQuad is powered by a quad core 1.5 GHz ARM CORTEX-A53 with an auxiliary ARM M4
- We are working with the NXP release "L5.4.70_2.3.3" patch release. This was developed using the Yocto Project Zeus (3.0) branch / release.
- Zeus 3.0 was released October 2019.
- Our Yocto Machine: imx8mqevk
- Our Yocto distro: "fsl-imx-wayland"
- There is an EVKB and EVK. We are using the EVKB, and this has an upgrade to the WIFI over the EVK and a later revision of the i.MX8 SoC.
In this article, we discuss the following steps in order:
- Create a toolchain for use outside the Yocto Build Environment
- Build the NXP linux-imx kernel using the external SDK / toolchain
- Use U-boot to load the kernel, device tree, and rootfs using TFTP and NFS
- Create and share kernel patches via email to speed collaboration
Create a toolchain for building the Linux kernel outside the Yocto project
This section assumes that you have already successfully built the NXP BSP using the Yocto Project. If you haven't, please review the steps detailed in Build, Install, and Develop with NXP's Latest Yocto Linux BSP for the MCIMX8M-EVK .
Build the GNU toolchain / SDK for the NXP BSP as shown below. Note that our build machine is an Ubuntu Linux 18.04 Intel PC.
$ cd /build/imx8/
$ source sources/poky/oe-init-build-env bld-wayland/

$ bitbake imx-image-multimedia -c populate_sdk

$ ls /build/imx8/bld-wayland/tmp/work
aarch64-mx8m-poky-linux  all-poky-linux        sdk-provides-dummy-nativesdk-pokysdk-linux  x86_64-linux
aarch64-poky-linux       imx8mqevk-poky-linux  sdk-provides-dummy-target-poky-linux        x86_64-nativesdk-pokysdk-linux

$ cd /build/imx8/bld-wayland/tmp/deploy/sdk
$ ls *.sh
fsl-imx-wayland-glibc-x86_64-imx-image-multimedia-aarch64-imx8mqevk-toolchain-5.4-zeus.sh

$ ./fsl*.sh

NXP i.MX Release Distro SDK installer version 5.4-zeus
======================================================
Enter target directory for SDK (default: /opt/fsl-imx-wayland/5.4-zeus):
You are about to install the SDK to "/opt/fsl-imx-wayland/5.4-zeus". Proceed [Y/n]? y
Extracting SDK.........done
Setting it up...done
SDK has been successfully set up and is ready to be used.
Each time you wish to use the SDK in a new shell session, you need to source the environment setup script e.g.
 $ . /opt/fsl-imx-wayland/5.4-zeus/environment-setup-aarch64-poky-linux
Since we're going to be using this toolchain primarily to build the Linux Kernel, let's make the following change to the environment script:
# export LDFLAGS="-Wl,-O1 -Wl,--hash-style=gnu -Wl,--as-needed -fstack-protector-strong -Wl,-z,relro,-z,now"
export LDFLAGS="-O1 --hash-style=gnu --as-needed -fstack-protector-strong -z,relro,-z,now"
Now, let's source our toolchain environment and give our toolchain a try:
cd /build
$ source /opt/fsl-imx-wayland/5.4-zeus/environment-setup-aarch64-poky-linux

$ echo $CROSS_COMPILE
aarch64-poky-linux-

$ echo $ARCH
arm64

$ aarch64-poky-linux-gcc --version
aarch64-poky-linux-gcc (GCC) 9.2.0
...
Build the linux-imx Kernel
Before we clone the linux-imx kernel, lets make sure we know the source repo and commit we want. It's our goal to build the same kernel as that was built by the NXP Yocto BSP.
$ cd /<BSP build path>/tmp/work/imx8mqevk-poky-linux/linux-imx/5.4-r0/git

$ git log

commit 8c73bc625c4d8543737c30787517e432a9f56e0d (HEAD -> imx_5.4.70_2.3.0, origin/imx_5.4.70_2.3.0)
Author: Nitin Garg
Date:   Wed Jan 6 19:59:22 2021 -0600

    LF-2692: clk: imx: scu: Do not enable runtime PM for CPU clks

    Since CPU clocks are managed by CPUFREQ, do not enable
    runtime PM otherwise rpm gets out of status as cpufreq
    also manages clock states.
...

$ more .git/config
...
[remote "origin"]
	url = https://source.codeaurora.org/external/imx/linux-imx.git
...
It may be helpful to note that the following two Ubuntu development packages will be required when building the kernel:
$ sudo apt install libelf-dev libyaml-dev
Now we're ready to clone and build the NXP linux-imx kernel outside the Yocto Project.
$ cd /build
$ git clone https://source.codeaurora.org/external/imx/linux-imx.git
Cloning into 'linux-imx'...

$ cd linux-imx
$ git checkout 8c73bc62
Checking out files: 100% (82326/82326), done.
Note: checking out '8c73bc62'.

...

HEAD is now at 8c73bc625c4d LF-2692: clk: imx: scu: Do not enable runtime PM for CPU clks

$ mkdir build_evk
$ cp arch/arm64/configs/imx_v8_defconfig build_evk/.config

$ make  V=1 LOADADDR=0x40480000 O=build_evk olddefconfig

$ more build_evk/.config
#
# Automatically generated file; DO NOT EDIT.
# Linux/x86 5.4.70 Kernel Configuration
#
...
Note above that our build output is being written to /build/linux-imx/build_evk.
Next let's build the kernel:
$ make V=1 LOADADDR=0x40480000 O=build_evk/
...
  aarch64-poky-linux-ld -r  -EL  -maarch64elf  --build-id  -T ../scripts/module-common.lds -T ../arch/arm64/kernel/module.lds -o sound/usb/snd-usbmidi-lib.ko sound/usb/snd-usbmidi-lib.o sound/usb/snd-usbmidi-lib.mod.o;  true
sh ../scripts/modules-check.sh
make -f ../scripts/Makefile.build obj=arch/arm64/boot arch/arm64/boot/Image
  aarch64-poky-linux-objcopy  -O binary -R .note -R .note.gnu.build-id -R .comment -S vmlinux arch/arm64/boot/Image
make -f ../scripts/Makefile.build obj=arch/arm64/boot arch/arm64/boot/Image.gz
  cat arch/arm64/boot/Image | gzip -n -f -9 > arch/arm64/boot/Image.gz
make[1]: Leaving directory '/build/linux-imx/build_evk'

# compile the kernel modules
$ make V=1 LOADADDR=0x40480000 O=build_evk/ modules
...
make -f ../scripts/Makefile.modpost
  sed 's/ko$/o/' modules.order | scripts/mod/modpost -m  -o ./Module.symvers        -s -T - vmlinux
make -f ../scripts/Makefile.modfinal
sh ../scripts/modules-check.sh
make[1]: Leaving directory '/build/linux-imx/build_evk'

# install the modules
$ make V=1 LOADADDR=0x40480000 O=build_evk/ modules_install INSTALL_MOD_PATH=modules
...
  mkdir -p modules/lib/modules/5.4.70-00016-g8c73bc625c4d/kernel/sound/usb ; cp sound/usb/snd-usbmidi-lib.ko modules/lib/modules/5.4.70-00016-g8c73bc625c4d/kernel/sound/usb ; true modules/lib/modules/5.4.70-00016-g8c73bc625c4d/kernel/sound/usb/snd-usbmidi-lib.ko ; true modules/lib/modules/5.4.70-00016-g8c73bc625c4d/kernel/sound/usb/snd-usbmidi-lib.ko  ; true modules/lib/modules/5.4.70-00016-g8c73bc625c4d/kernel/sound/usb/snd-usbmidi-lib.ko
  sh ../scripts/depmod.sh /sbin/depmod 5.4.70-00016-g8c73bc625c4d
make[1]: Leaving directory '/build/linux-imx/build_evk'

$ ls build_evk/vmlinux
build_evk/vmlinux

$ find build_evk/ -name 'imx8mq-evk.dtb'
build_evk/arch/arm64/boot/dts/freescale/imx8mq-evk.dtb

$ ls build_evk/modules/lib/modules/
5.4.70-00016-g8c73bc625c4d
Before we move on, let's create a Cscope project to help with debugging and introspection:
$ make V=1 LOADADDR=0x40480000 O=build_evk/ cscope

$ cd build_evk
$ cscope -d
Your terminal should become a Cscope command window. Try typing in "start_kernel" into "Find this global definition". Cscope is fantastic for a quick lookup on where structs and the like are defined.
Use U-boot to perform an NFS boot
This section assumes you have connected your NXP EVKB to your (Linux) PC via the Type-B USB connector. On Ubuntu Linux, we like kermit.
If you connect after your EVK has already booted Linux, you'll get a login prompt as shown below. Log in and then reboot. Note that you'll want to stop U-boot from booting again, so be ready to hit a key when you see the U-boot shell prompt. Note that we're using the version of U-Boot included in the NXP BSP and installed on our SD Card.
NXP i.MX Release Distro 5.4-zeus imx8mqevk ttymxc0

imx8mqevk login:

$ reboot
...
...
...

U-Boot 2020.04-5.4.24-2.1.0+g4979a99482 (Aug 08 2020 - 03:58:09 +0000)

CPU:   i.MX8MQ rev2.1 1500 MHz (running at 1000 MHz)
CPU:   Commercial temperature grade (0C to 95C) at 43C
Reset cause: POR
Model: NXP i.MX8MQ EVK
DRAM:  3 GiB
TCPC:  Vendor ID [0x1fc9], Product ID [0x5110], Addr [I2C0 0x50]
MMC:   FSL_SDHC: 0, FSL_SDHC: 1
Loading Environment from MMC... Run CMD11 1.8V switch
*** Warning - bad CRC, using default environment

[*]-Video Link 0imx8m_hdmi_probe
 (1280 x 720)
	[0] display-controller@32e00000, video
	[1] hdmi@32c00000, display
In:    serial
Out:   serial
Err:   serial

 BuildInfo:
  - ATF b0a00f2
  - U-Boot 2020.04-5.4.24-2.1.0+g4979a99482

Run CMD11 1.8V switch
switch to partitions #0, OK
mmc1 is current device
flash target is MMC:1
Run CMD11 1.8V switch
Net:
Warning: ethernet@30be0000 using MAC address from ROM
eth0: ethernet@30be0000
Fastboot: Normal
Normal Boot
Hit any key to stop autoboot:  0
Do yourself a favor and increase bootdelay and save it:
> setenv bootdelay 10
> saveenv
Saving Environment to MMC... Writing to MMC(1)... OK
Let's take a look at our default U-Boot environment:
u-boot=> printenv
baudrate=115200
board_name=EVK
board_rev=iMX8MQ
boot_fdt=try
bootcmd=mmc dev ${mmcdev}; if mmc rescan; then if run loadbootscript; then run bootscript; else if run loadimage; then run mmcboot; else run netboot; fi; fi; else booti ${loadaddr} - ${fdt_addr}; fi
bootcmd_mfg=run mfgtool_args;if iminfo ${initrd_addr}; then if test ${tee} = yes; then bootm ${tee_addr} ${initrd_addr} ${fdt_addr}; else booti ${loadaddr} ${initrd_addr} ${fdt_addr}; fi; else echo "Run fastboot ..."; fastboot 0; fi;
bootdelay=10
bootscript=echo Running bootscript from mmc ...; source
console=ttymxc0,115200
emmc_dev=0
ethaddr=00:04:9f:06:31:cf
ethprime=FEC
fastboot_dev=mmc1
fdt_addr=0x43000000
fdt_file=imx8mq-evk.dtb
fdt_high=0xffffffffffffffff
fdtcontroladdr=fd11b448
image=Image
initrd_addr=0x43800000
initrd_high=0xffffffffffffffff
jh_clk=
jh_mmcboot=setenv fdt_file imx8mq-evk-root.dtb; setenv jh_clk clk_ignore_unused; if run loadimage; then run mmcboot; else run jh_netboot; fi;
jh_netboot=setenv fdt_file imx8mq-evk-root.dtb; setenv jh_clk clk_ignore_unused; run netboot;
kboot=booti
loadaddr=0x40480000
loadbootscript=fatload mmc ${mmcdev}:${mmcpart} ${loadaddr} ${script};
loadfdt=fatload mmc ${mmcdev}:${mmcpart} ${fdt_addr} ${fdt_file}
loadimage=fatload mmc ${mmcdev}:${mmcpart} ${loadaddr} ${image}
mfgtool_args=setenv bootargs console=${console},${baudrate} rdinit=/linuxrc clk_ignore_unused
mmcargs=setenv bootargs ${jh_clk} console=${console} root=${mmcroot}
mmcautodetect=yes
mmcboot=echo Booting from mmc ...; run mmcargs; if test ${boot_fdt} = yes || test ${boot_fdt} = try; then if run loadfdt; then booti ${loadaddr} - ${fdt_addr}; else echo WARN: Cannot load the DT; fi; else echo wait for boot; fi;
mmcdev=1
mmcpart=1
mmcroot=/dev/mmcblk1p2 rootwait rw
nandfit_part=yes
netargs=setenv bootargs ${jh_clk} console=${console} root=/dev/nfs ip=dhcp nfsroot=${serverip}:${nfsroot},v3,tcp
netboot=echo Booting from net ...; run netargs;  if test ${ip_dyn} = yes; then setenv get_cmd dhcp; else setenv get_cmd tftp; fi; ${get_cmd} ${loadaddr} ${image}; if test ${boot_fdt} = yes || test ${boot_fdt} = try; then if ${get_cmd} ${fdt_addr} ${fdt_file}; then booti ${loadaddr} - ${fdt_addr}; else echo WARN: Cannot load the DT; fi; else booti; fi;
script=boot.scr
sd_dev=1
serial#=161369d6f32ef628
soc_type=imx8mq
splashimage=0x50000000
Some necessary env vars we'll need for NFS boot are shown below. Note that we're not going to make use of DHCP. Instead, we know and use the static IP address for our EVK board. serverip is our TFTP server that we'll set up below.
u-boot=> setenv serverip <NFS server IP addr>
u-boot=> setenv ipaddr <target IP addr>
u-boot=> saveenv
Before we set up our own env variables for nfs_boot, let's take a closer look at what NXP configured by default for SD Card / MMC boot:
And if we wanted to use the default NXP configuration to perform a default boot, then we would use boot, which is basically the same as 'run bootcmd':
u-boot=> printenv bootcmd
bootcmd=mmc dev ${mmcdev}; if mmc rescan; then if run loadbootscript; then run bootscript; else if run loadimage; then run mmcboot; else run netboot; fi; fi; else booti ${loadaddr} - ${fdt_addr}; fibootcmd=mmc dev ${mmcdev}; if mmc rescan; then if run loadbootscript; then run bootscript; else if run loadimage; then run mmcboot; else run netboot; fi; fi; else booti ${loadaddr} - ${fdt_addr}; fi
loadimage: load the Linux kernel image into RAM:
u-boot=> fatload mmc ${mmcdev}:${mmcpart} ${loadaddr} ${image}
28021248 bytes read in 333 ms (80.2 MiB/s)
loadfdt: load the Device Tree into RAM:
u-boot=> fatload mmc ${mmcdev}:${mmcpart} ${fdt_addr} ${fdt_file}
43912 bytes read in 15 ms (2.8 MiB/s)

u-boot=> echo ${fdt_file}
imx8mq-evk.dtb
bootargs: set console and root:
bootargs=console=ttymxc0,115200 root=/dev/mmcblk1p2 rootwait rw
Boot the Kernel with booti:
booti 0x40480000 - 0x43000000
We now know enough to create our nfs_boot env variable:
u-boot=> setenv nfs_boot "tftp 0x40000000 imx8/bsp/imx8.img; source 0x40000000"
u-boot=> saveenv
Saving Environment to MMC... Writing to MMC(1)... OK
nfs_boot will perform a tftp of our "imx8.img" script from our TFTP server. Once the script is loaded into RAM, the script will run it using the source command.
Note that our nfs_boot requires that you set up a TFTP server and configure your Linux box for NFS. If you don't know how to do this on Ubuntu, then refer to the references at the bottom of this page.
We show below our TFTP script imx8.txt and how we build imx8.img from imx8.txt:
$ cd /build/tftp/imx8/bsp/
$ more imx8.txt
setenv bootargs root=/dev/nfs nfsroot=192.168.3.75:/build/rootfs/imx8/rootfs,v4,tcp ip=192.168.3.99:192.168.3.75:192.168.3.1:255.255.255.0:i
mx8mqevk:eth0:off console=ttymxc0,115200 earlycon=ec_imx6q,0x30860000,115200
tftp 0x40480000 imx8/bsp/Image
tftp 0x43000000 imx8/bsp/imx8mq-evk.dtb
booti 0x40480000 - 0x43000000

$ mkimage -T script -C none -n "uboot load script" -d nfs.txt nfs.img
Note that mkimage is available on Ubuntu in the "u-boot-tools" package:
$ sudo apt install u-boot-tools
As you can see in the script above, we're booting our kernel, device tree, and rootfs over the network. Some details on our nfs.txt script:
- 192.168.3.75: Our TFTP/NFS server, which is also our Ubuntu 18.04 build machine
- 192.168.3.99: Our NXP EVK
- 192.168.3.1: Our Ethernet gateway
- /build/rootfs/imx8/rootfs: local rootfs folder copied from Yocto Project build
We copy Image and imx8mq-evk.dtb from our build_evk folder to the location specified in our script under our local TFTP root folder. However, our rootfs is reused from our Yocto Project build of the NXP BSP. We copy the entire rootfs folder to a location that can be mounted via NFS and change the owernship to root as shown below:
$ cd /build/imx8/bld-wayland/tmp/work/imx8mqevk-poky-linux/imx-image-multimedia/1.0-r0
$ sudo cp -r rootfs <nfs rootfs folder>
$ cd <nfs rootfs folder>
$ sudo chown -R root:root *
Once these steps are complete, we can perform an NFS boot as follows:
> run nfs_boot
Using ethernet@30be0000 device
TFTP from server 192.168.3.75; our IP address is 192.168.3.99
Filename 'imx8/bsp/nfs.img'.
Load address: 0x40000000
Loading: #
	 63.5 KiB/s
done
Bytes transferred = 393 (189 hex)
## Executing script at 40000000
Using ethernet@30be0000 device
TFTP from server 192.168.3.75; our IP address is 192.168.3.99
Filename 'imx8/bsp/Image'.
Load address: 0x40480000
Loading: #################################################################
	 #################################################################
	 ...
	 #######
	 4.2 MiB/s
done
Bytes transferred = 23327232 (163f200 hex)
Using ethernet@30be0000 device
TFTP from server 192.168.3.75; our IP address is 192.168.3.99
Filename 'imx8/bsp/imx8mq-evk.dtb'.
Load address: 0x43000000
Loading: #########
	 418.9 KiB/s
done
Bytes transferred = 44646 (ae66 hex)
## Flattened Device Tree blob at 43000000
   Booting using the fdt blob at 0x43000000
   Using Device Tree in place at 0000000043000000, end 000000004300de65

Starting kernel ...
Create and share patches via email
Below we show modifying the linux-imx kernel, creating a patch, and emailing it using Git tools:
# add a printk to mx6s_capture.c and diff it
$ git diff drivers/media/platform/mxc/capture/mx6s_capture.c
..
@@ -2018,6 +2021,8 @@ static int mx6s_csi_probe(struct platform_device *pdev)

        csi_dev->vdev = vdev;

+       printk("CSI Bridge base regs=0x%lx\n",csi_dev->regbase);
+
        video_set_drvdata(csi_dev->vdev, csi_dev);
        mutex_lock(&csi_dev->lock);

# create a dev branch for custom patches
$ git checkout -b development
M	drivers/media/platform/mxc/capture/mx6s_capture.c

$ git add drivers/media/platform/mxc/capture/mx6s_capture.c

$ git commit -m 'add a printk to probe'

$ git format-patch -1
0001-add-a-printk-to-probe.patch

$ git send-email --to <recipient> --suppress-cc=all 0001-add-a-printk-to-probe.patch
On the receiving side, the recipient can save the patch to the linux-imx folder and apply as shown:
$ git am < 0001-add-a-printk-to-probe.patch
Applying: add a printk to probe
Summary
In this article, we have shown various ways that we accelerate development with the NXP linux-imx kernel. These tips also apply in general to any embedded Linux kernel.
It should be noted that we can modify the linux-imx kernel source and rebuild & reboot in typically less than five minutes on a quad-core Intel I7, 16GB RAM, and a magnetic drive, which is a modest build machine by today's standards.
This article is a work in progress, so please submit any errors or questions in the comment blox below.
References and Resources
- Linux Kernel documentation
- Ask Ubuntu: How do I install and run a TFTP server?
- Ubuntu Network File System (NFS)
- man nfs
- Mounting the root filesystem via NFS (nfsroot)
- Cscope
Acronyms and Terms
- OCRAM: On-Chip RAM Memory Controller
- OP-TEE: Open Portable Trusted Execution Environment
- SPL: Second Program Loader
- SRC: i.MX8 System Reset Controller
- TCM: Tightly-Coupled-Memory
- TZ: Trust Zone


